Thursday, June 29, 2006

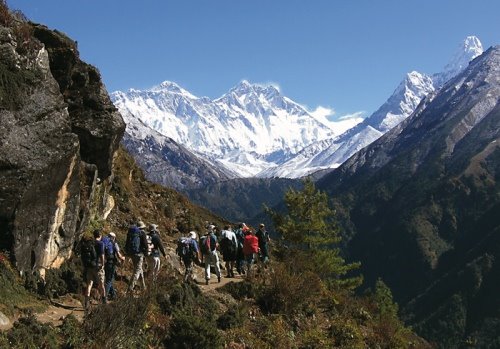
UPDATE: All the gear, new tent (again), trial run

We did manage to go down to MEC and bought all the last few odds and ends (see list in previous post). It was fun to go down and surf through all the gear available. At one point, I turned to Gerry and suggested that our bigger purchase for next year should be a high quality tent...this comment was enough to get us both thinking (see below). We did well to keep to our list of "needs" and made it back home in time for Gerry to accompany Marie to an appointment.

That afternoon, Gerry and I decided to put the tents up in the back yard. We first put up my big 3 man dome tent, that weighs in at a booming 10 lbs and then the much lighter 2 man bivy. As we stood staring at both of these very different tents, we both saw a problem with each.

The Dome Tent: Too Big, Too heavy and more tent then we even need

The Bivy Tent: Tight fit for both of us, Water resistance questionable

So where does that leave us? Looking at getting a new tent this year of course. I give Gerry full marks for pointing out that we might be able to get away with using the Bivy, but once we starting looking at getting an MSR Hubba Hubba, he was quick to get on board. We ended up getting a brand new one from the Gear Swap on the MEC website for a good price and will be picking it up early next week.

On a different note Gerry and I fired up out MSR simmerlite stove last weekend and even tried our hand at baking using our Outback Oven. We made brownies and a pizza, both turned out pretty good...despite some errors on our part. I am glad we did this trial, as it will be good experience when we are on the trip. We took pictures and video that I will add to this when I can get it from Gerrys cam.

Wednesday, June 28, 2006

Uncivilized Behaviour - Sometimes you can't get far enough away

This is a great article written by Kevin Callan that I thought everyone should read:


True, proper wilderness preparation should plan for a range of eventualities, but I’m not feeling too badly about the reason we’re stranded on this beach.  The bush pilot scheduled to pick us up today was arrested yesterday for being involved in a pornography scandal. I’m not sure I could have seen that one coming.

Now our crew of six paddlers is waiting as patiently as the cold and wet will allow for another pick-up, which we were told could be two or three more days. Our food supply consists of half a bag of GORP, a package of instant potatoes, a dozen prunes and possibly, a trusting cottontail who’s hanging around our camp looking for companionship. The battery in our satellite phone is on its death bed because our of our group insisted on calling his wife twice a day throughout the trip for conversations that usually ended in heated marital discussions at four dollars a minute; another is green from trying to drown his sorrows with the majority of our spirits; and we were informed by the air service that the tires on both shuttle vehicles we left parked at the end of an 80-kilometer dirt road were slashed by some local militants who had a dislike for canoeists intruding on their secret fishing grounds.

It’s not a good day. The truth is, it’s not been a good week. We’ve been paddling upstream the entire trip, when there was enough water to actually paddle. Water levels were low enough that we left a trail of Royalex shavings on the river bed like Hansel and Gretel leaving  bread crumbs through the Black Forest. The only way out is to paddle six more days or wait for another float plane to arrive. I hope it’s flown by a law-abiding Baptist minister with a family filter on his we browser.

I spend a lot of time traveling the bush, and I spend my fair share of time worrying abut marauding bears, violent storms and becoming hopelessly lost. Never have I worried about being stranded in the wilderness with an overly communicative husband and a tapped-out drunk due to a pervert and some insecure fishermen.

I guess it just goes to show you that the ugliness you’re trying to escape back home can still reach you out here. I think I’ll stop worrying so much about bears, storms and getting lost.

Wednesday, June 14, 2006

How to fit your pack

Fitting a pack properly is one of the most important things you can do to make you trip as comfortable as possible. With that in mind I have put together this post to make the process a bit more easy to follow. Now it should be noted, there are many different instructions on "the right way" to fit a pack...this is simply the one I liked the best.


There are three landmarks used in fitting a pack:

  1. The hip belt should be centered at the hip bone
  2. The lift strap locator at the collar bone
  3. The lift rising at an angle between 30 and 45 degrees from horizontal

The following steps will walk you through the process, so keep your landmarks in mind and the result will be a perfectly-fitted pack.:

  1. Load the pack with 20-30 pounds of gear. Try to pack the weight as you would when actually carrying the pack–if it is one dense lump at the bottom of the pack, it will be difficult to fit the pack properly.
  2. Remove the back pad (if possible) this will be replaced after fitting. Then, loosen all straps which include lift straps , shoulder straps , anti-sway straps , and reverse lift straps .
  3. Pull the lift strap locators to their lowest position.
  4. Ensure that the shoulder pads are spaced at an even distance from the wedge for your height. For small-framed people with thin shoulders, the pads should be touching the wedge; for average-sized people, allow about an inch of webbing between the wedge and the pad. For those with weight-lifter shoulders and barrel chests, start with at least two inches of webbing between the pad and the wedge. Micro adjustments of the shoulder compensator will be addressed later; however, before you proceed, it is essential that both shoulder pads have the same amount of webbing between the pad and the wedge.
  5. Put the pack on and tighten the belt with the center seam on your hip bone . If you prefer the belt to ride a bit higher or lower, make sure the belt is at that position before you proceed. At this point, you are essentially wearing a 30-lb fanny pack; have a friend hold the pack in to your back, but do not tighten the shoulder straps.
  6. Have your friend hold the lift strap locator at your collar bone. You should then pull webbing through the shoulder strap adjustment Tensionlock until all slack is out of the webbing and the bottom of the straps are touching your chest, a few inches below your underarm. If you are a smaller person, you may want to slide the lift strap locator up an inch or so.
  7. Now have your friend push the wedge system down, until the shoulder pad wraps smoothly around your shoulder and the lift straps are rising at a 30- to 45-degree angle off horizontal when pulled snug. The wedge should end up approximately one inch below the top of your shoulder blades with the lift strap locator
    still at your collar bone. If you need to adjust the width of the shoulder pads in or out from your neck, slide a credit card under the diagonal strip at the top of the pad (15) to release the hook and loop.
  8. When putting on the pack, loosen the lift, shoulder, and reverse lift straps . Put the pack on and tighten the belt at your hip bones. Pull the shoulder straps to a comfortable tension and adjust the lift straps to shift the weight to your shoulders or hips as desired. Then pull the reverse lift straps up tight. The anti-sway straps should only have moderate tension when in use mostly on rough terrain. Otherwise, the anti-sway straps should not be needed. As you hike, adjust the lift strap to shift the weight between the legs and shoulders as desired.

UPDATES: Going Co-op, Topic of the week, Countdown Continues...


Well the much anticipated trip to MEC is scheduled to happen Thursday and unless there are any major problems, we will have all of the remaining gear for the trip. In case you are unaware, we are going down to get certain items, but as is usually the case with Gerry and I, we leave room for a few last minute "must haves" as well.

I must say, I am always pumped to do anything related to the trip, but this trip has a bigger meaning. At times, neither Gerry or I were sure if the trip would be able to happens this year and so going to get the final items on the list mean that it is actually going to happen! Very cool!!!

The things on our official "Algonquin 2006 Shopping List" are:

1. MEC Wave Waist Pack
2. backpackers Pantry Cinnamon Coffee Cake (3)
3. Nalgene1L Wide-Mouth Lexan Water Bottle
4. Source C-2 Hydration System 3 Liter
5. Outback Oven 10"
6. backpackers Pantry Wicked Good Brownies (4)
7. backpackers Pantry Supreme Pizza (4)
8. MEC Large Tent Gear Loft #(4014-227)


As many have already noted, I will be posting a weekly article (or more if I feel like it) on topics relating to backpacking and canoe trips. They will be a compilation of all the info. I have gathered on a given subject and then put down the way I interprets it. It will be a healthy mixture of opinion and fact. As usual all input is welcome...

Lastly, the countdown continues and we are now so close I can almost hear the waves washing against the shore. The picture above gave me that "Algonquin feeling" the second I saw it and for those that have experienced a sunset in the park, you know how it has a way of imprinting itself on you and the only way to experience that feeling again, is to return.

51 days 4 hours and 47 minutes and counting...

Monday, June 12, 2006

Making Camp in Adverse Conditions

Know your tent so well that you can pitch it even when you're too tired to think. For greatest weather resistance and strength, pitch your tent very taut and tighten guylines until, you can play a tune on them. This also minimizes flapping and noise. In some areas and at certain times, setting up camp is not so easy.Making camp on rocky terrain, in snow, in high winds, in the rain.
In rocky terrain where stakes won't go in you may have to attach loops to the staking points and tie them and the guylines to rocks to hold down the tent.

In Wind:

If it's windy, stake out the end of the inner or outer, whichever pitches first, that will face into the wind, then thread or clip the poles into position before raising the tent off the ground. In a strong wind, you may have to lay on the tent while you do this. Once the basic shape is established, the rest of the staking can be done in a more relaxed manner.
If the site allows, rectangular or tapered tents should be pitched with the tail or end into the wind; keeping the door in the lee of the wind is a good idea for cooking, too.

In extreme cold/rain:

When striking camp, pack the tent last so that it can air out and any condensation can dry. Remember that shock cord-linked poles must be pushed out of their sleeves. If you pull them, they're likely to come apart.
In rain, pack everything under cover. In very heavy rain, you can collapse the inner tent, leaving the fly sheet staked out, withdraw the poles, and then stuff the inner into its bag from under the fly sheet so that it stays dry.
In very cold conditions, pole sections may freeze together - don't try to force them apart, and they may break. Instead, rub the joints with your hands until the ice melts. If the poles are frozen together, the chances are that any condensation will have frozen to the fly sheet. If the fly sheet is coated with ice on the inside and frost on the outside, shake as much of it off as you can before you pack it. If the day is sunny and you have time, you could wait for it to thaw and evaporate.

Thursday, June 08, 2006

Gerry and Jim going to Mt. Everest ?

I will never forget the first time I saw a picture of Mt. Everest.

It was as a kid (maybe 7 years old), while looking through a stack of old National Geographic magazines in the basement of our home just outside of Montreal. I picked up a copy and opened to pictures of men at the Everest Base camp preparing to assault the summit. As I continued to flip pages, still in awe of the the incredible photographs, a map slipped out and fell to the floor. I remember so clearly, opening that map of the Napal and wanting to be there....and now it may actually happen.

I will be turning 40 in 5 years and to celebrate I want to go on an exhibition to the historic Everest Base camp. This would be the trip of a lifetime for me and not to sound girlie, but I get goosebumps just thinking about it. It is a 3 week trip and is not cheap, but is a once in a life time trip that I have always wanted to do. I have talked to Tanyia about it and she was fine with it, as long as: a) She does not have to come b) We go to Hawaii for our 10 year anniversary. For me, this confirms two things about her: a) Tanyia really want to go to Hawaii b) I have the coolest wife in the world!

I briefly pitched the idea to Gerry the other day and my hope is that he will want to go. This trip is the kind of thing best shared with a friend and since this is not Tanyia's idea of a vacation, there is no one I would rather go with then Gerry...but no pressure buddy!

Wednesday, June 07, 2006

Backpack:Packing your Pack

Strategically loading the items in your internal-frame pack can dramatically influence your speed, endurance, and enjoyment of an outing. With that in mind, I have compiled information from many sources to help anyone pack a their pack better.

Generally, concentrate the load on your hips and avoid loading your back and shoulders. For on-trail travel, keep the heaviest items high and close to your back. Off-trail, for better balance, pack heavy items lower down.

  • On trails, carry the load high and fairly close to the back, as this will allow your hips to take the majority of the weight. To implement this strategy, load your lightest, fluffiest articles (sleeping bag, extra clothing) in the bottom; l place the densest items (water, food, stove fuel, rope) up top, near the shoulder blades.
  • For more difficult terrain, revise your trail-packing strategy. Pack the heavy items slightly lower and ensure they are as close to the back as possible. This will force more of the load onto your back and shoulders but will lower your center of gravity and allow you to more easily keep your balance.

Quick list to packing your internal frame pack:

  1. Loosen all comression straps.
  2. Fill bottom compartment with sleeping bag and clothes.
  3. Fill main compartment with rest of gear, keeping the heaviest items high and close to your back.
  4. Put frequently used items in top compartment or top pockets.
  5. Tighten all compression straps to compress the load and keep it from shifting while you hike.

Easy access to frequently used items.

Along with arranging items in your pack for optimum weight distribution, organize them for quick access. Articles like gloves, hats, sunglasses, maps, and insect repellent, which are sometimes needed at a moment's notice, are ideally carried in side and top pockets. Such gear can also be kept handy in jacket pockets or in a fanny pack that is worn on the abdomen in combination with the main pack.Keep your contents dry.


Determine a strategy to keep your pack contents dry in rainy weather, because even packs constructed from waterproof materials are not necessarily waterproof. Water can leak through seams, zippers, pockets, the top opening, and places where the coating has worn off. Individual plastic bags or good stuff sacks can help protect pack contents, especially when you have to set up or break camp in the rain. Most pack manufacturers offer waterproof pack covers as accessories. You may also choose to simply use a large plastic trash bag as a waterproof liner inside your pack.

Backpacking Food:Too many carbs and not enough protein

As I continue to read about what a typical backpackers diet is, the more I see a real problem with how most people eat while packing. In 99% of the books and articles I have read they place too much emphasizes on eating carbohydrates as the main source of energy. I have a problem with this for couple of reasons:


  • There are different types of carbs and each effect your blood sugar/energy level differently. For example: The sugar in a chocolate bar will break quickly, giving you an initial boost, but that boost does not last long and as that sugar is burnt off, your blood sugars will crash and so will your overall energy level and mood. On the other hand, dried fruit is a far more complex form of sugar and will take longer to break down, therefore giving smaller amounts of sugar over a much longer period of time and avoiding the severe ups and downs of refined sugars.
  • My other issue is how badly protein is overlooked. Protein is the building blocks of all muscle, as most people are aware. Less known however, is how protein aids in stabilizing blood sugar levels. By adding small protein servings with your carbohydrates, you will sustain energy for long periods of time ( 3-4 hours between snacks/meals)

The next question you may be asking is " How much food do I need and what should I bring?". A general rule is 1 1/2 pounds of dry food per person per day. Most people find they eat less than at home for the first few days on the trail, but begin to get very hungry after 5 to 7 days. So by the end of a week-long trip you might be eating 2 pounds a day.


Pay no attention to the statement on any food label about how many people the contents serve. Try a dish at home to find out how many people it serves. Or else get an accurate little scale, and weigh things. If you plan by weight, you will have enough food overall, even if you have too many Backcountry Oven pizzas and brownies....as we will!


Strive for a diet of wholesome, natural foods. While every backpacker has his/her favorite items, the things that keep you going are protein, carbohydrate and fat.

  • Protein, carbs and fat: I recommend a hiking diet of about 40-50% carbos, 30-35% protein, 25-30% fat. Eat some protein at every meal - meat, powdered eggs, cheese, soy or bring low carb protein powder. It is especially important to have protein and fat for breakfast on a hiking day, as they give off their stored energy gradually, rather than quickly, as carbohydrates do. Eat some carbohydrates before you hike, even if it is just a few crackers or a bagel, to make sure that your glycogen reserves are stocked up and ready to fuel your body during the hike.
  • Fruits and veggies: You should have your vitamins, minerals and bulk in fruits and vegetables, but the weight problem won't allow you to carry much fresh produce, if any. Freeze-dried fruits are good but expensive. Ordinary dried fruits can be eaten plain or stewed. You can get your vegetables in dehydrated soups and stews, or you can buy dehydrated or freeze-dried vegetables unmixed with anything.
  • Snacks: Snacks are important to keep a hiker hiking, both by providing quick energy and, sometimes, comfort. There is room in every pack for a few sugary treats like candy bars, but remember that dried fruits, nuts and energy bars give more staying power than candy. Gum and small, wrapped candies are better left at home. They provide zero nutritional value their wrappers too often end up on the ground as litter.
  • Water: Backpackers need to drink lots of water. Hiking greatly increases a person's need for fluids to prevent dehydration, particularly at higher elevations and when exposed to direct sun ( canoeing for example). Drinking lots of water can offset the effects of this, as well as contribute to your well-being. Plan on drinking at least 1 liter of water every 2 hours and drink before you a thirsty, 'cause by the time you are thirsty your hydration is already compromised. Hot drinks with breakfast and dinner are helpful too replenish electolytes (Sodium, Potassium ect). Take a multi-vitamin daily.

By keeping a balance throughout the day, you can avoid the low energy times that can take some of the fun out of your trip.